
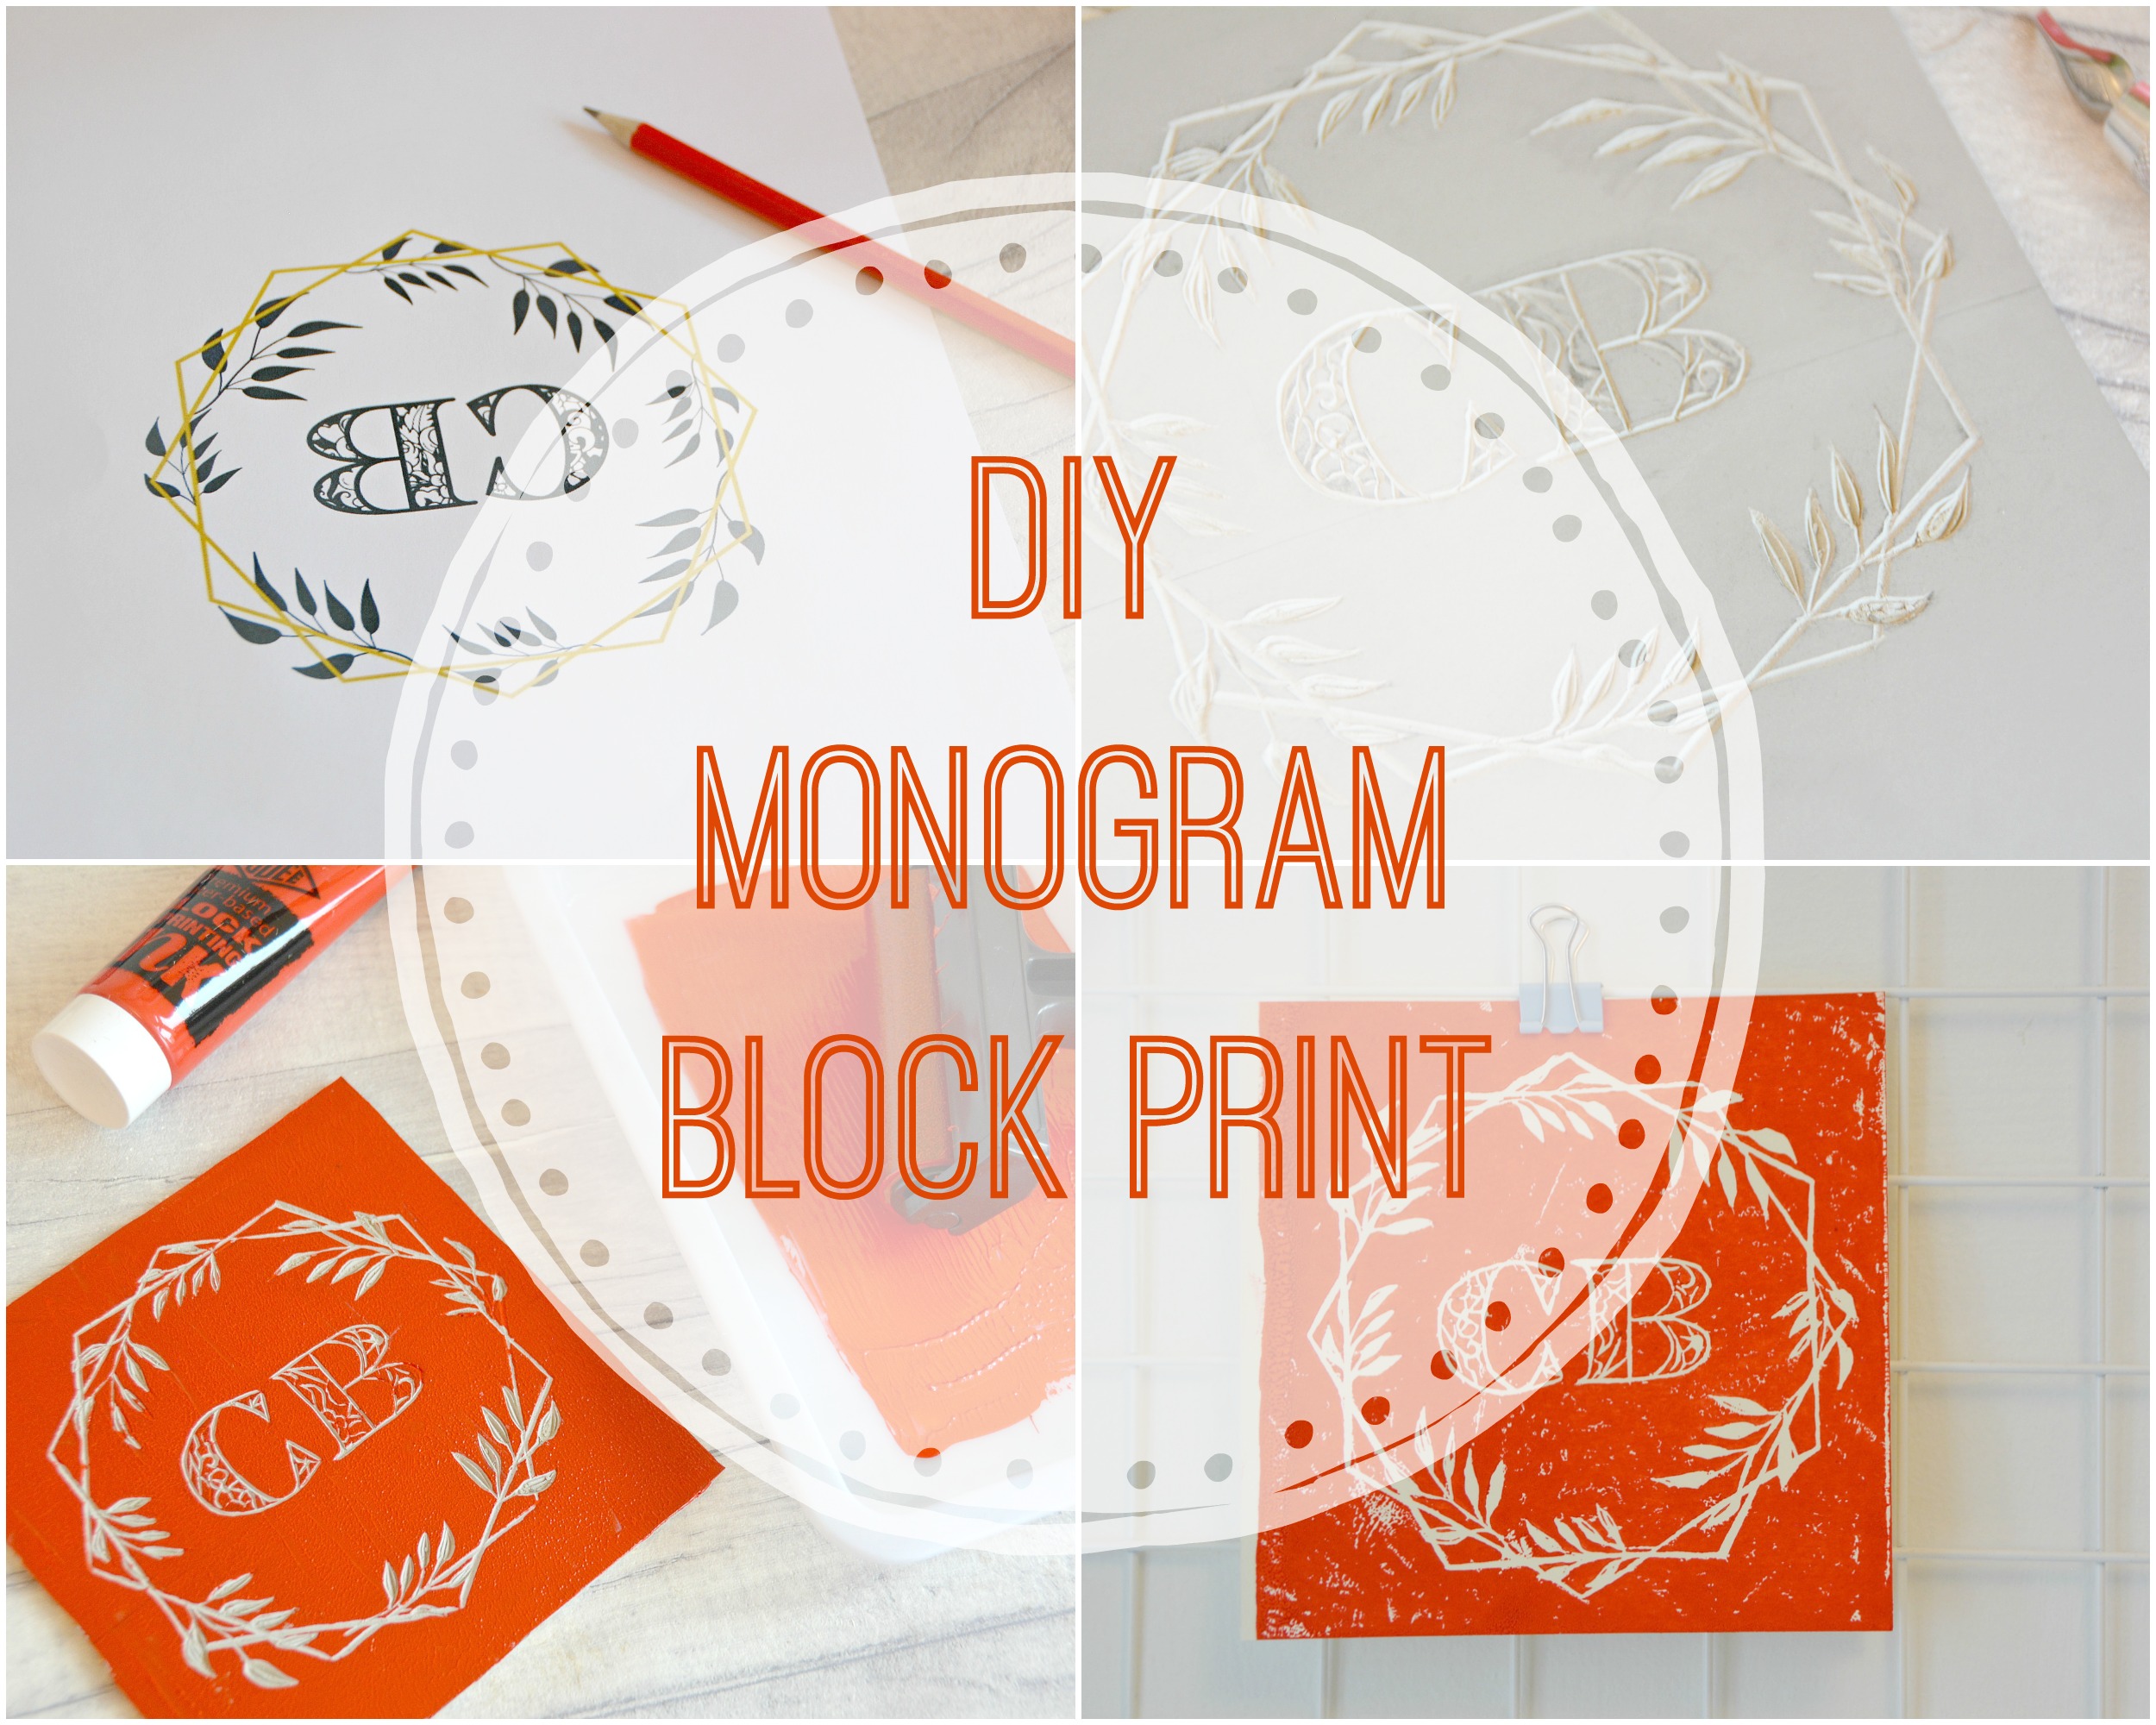
(This post contains a sponsored link) Block printing is one of my favourite relaxing crafts. I’ve loved doing it since I first tried it at school and have recently picked it up again as a hobby. I’m still learning how to get good at it and some of my projects are a little hit and miss. But I thought it would be fun to try this really simple project and share it with you today. This simple monogram block print design took me just over an hour to create and I’m pretty happy with the results. You could make these for your loved ones or just for yourself.
How to Make a Monogram Block Print
 To create my design, I used the Monogram Maker website, which is a really easy tool for designing a monogram. You simply put it your letters and can then change the fonts and add various backgrounds. I thought this design was very me and I love how it looks. There are so many different designs to choose from, that you’re sure to find the perfect one for you. I really enjoyed playing around with all the different options. Once you’ve created your design, all you need to do is print it out and you’re ready to start making your block print.
What You Need to Make a Monogram Block Print
 To make this project you will need, Lino blocks, Lino carving tool, block printing ink, ink roller and tray, tracing paper, a pencil and a ruler, as well as some good quality paper or card to print onto. I managed to pick up everything I needed to make my monogram block print in Hobbycraft.
How to Create a Monogram Block Print
 I then printed out my design, after using the monogram app. Luckily for me my initials look exactly the same in mirror image, but on your final design the monogram block print should be transferred onto the Lino backwards. So your print out should be the right way round, which isn’t clear in the pictures as I got a little lost along the way! Bear with me!
 You then need to trace your design onto your tracing paper using a sharp pencil and a ruler for any straight bits.
 When you’ve finished tracing your design, place in on top of the Lino block and clip it into place. The side you just traced needs to be facing down, so that it will transfer your design onto the Lino. I used a couple of bulldog clips to hold it in place. You then need to go over the reverse of your design with the pencil.
 Once you have finished, your design should be transferred on your piece of Lino perfectly. Remember that it should be in reverse (not like mine) so that when you apply the ink and print it, the monogram will be the right way round.
 It’s then time to start carving your design. Use different sized heads to carve different parts of the design. You may want to practice on a bit of Lino that you are not using, but you should get the hang of it pretty quickly.
 Once you have finished, dust off any excess pieces of Lino and trim the block down, so it just the right size for you to start printing.
 Use the tray and roller to evenly cover your block with ink. It should then be fully covered with a fine layer of the block printing ink. You can then place the paper over it and gently rub it all over to make sure all the ink has transferred onto the paper. Gently peel it away and allow it to dry.
How to Print a Monogram Block Print
 You can reuse your monogram block print over and over again and recreate it in lots of different colours. I usually rinse my block with warm soapy water and leave it dry, ready to be used all over again. I’m planning to make some more of these for the rest of the family.
 I really enjoyed using the Momagram Maker website and will definitely use it again. Not just for printing, but also for other craft projects and graphic design for the blog too. It is ideal for making greeting cards, wedding invitations, scrapbooks and personalised stationary. It’s free to use and really quick and handy. You can also upload photographs to add your monogram too, which would be great for social media.
What craft projects would you make a monogram for?
For more fun craft ideas, check out the Crafts and DIY section of the blog.
*This post contains a sponsored link with Monogram Maker, all opinions are my own.


No Comments